

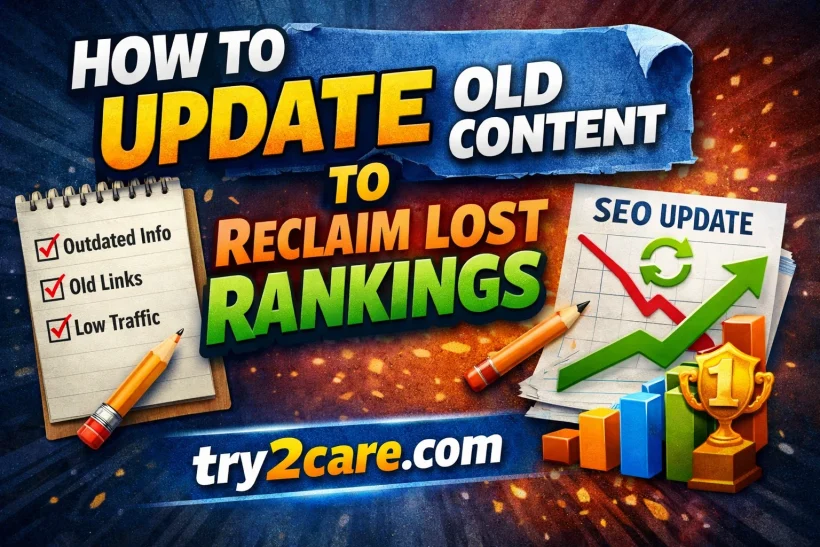
How to Update Old Content to Reclaim Lost Rankings
A practical, experience-backed guide to refreshing posts that have slipped in Google search.
I started this blog a few years ago, writing as fast as I could. For a while, that worked. Traffic grew, rankings climbed, and things felt good.
Then something changed. Posts that used to pull in thousands of visits every month started dropping. Slowly at first, then faster.
I checked Google Search Console one morning and saw a handful of articles had lost more than half their clicks over twelve months.
My first instinct was to write more new content. More posts, more keywords, more traffic. But that approach did not fix the problem. If anything, it spread my attention thinner.
The real fix was refreshing what I had already published. Once I understood that, everything changed. Over the past year, updating old posts became my highest-return activity.
In some cases, a single updated post went from 200 monthly visits back to over 1,500. In this guide, I am going to walk you through exactly how I do it.
Why Old Content Loses Rankings in the First Place
Before you can fix a problem, you need to understand it. There are a few reasons a post that once ranked well starts to fade.
The most common reason is content freshness. Google has something called the Query Deserves Freshness (QDF) signal.
For topics where information changes over time (like software tutorials, pricing guides, or anything in a fast-moving industry) Google tends to favour more recently updated pages.
According to Google's own documentation on how Search works, the algorithm tries to understand what kind of information a user needs and when they need it. A "best tools" article from 2021 may no longer match what a searcher expects to find in 2025.
The second reason is increased competition. When I first published some of my posts, there were few direct competitors.
Over time, other creators and brands entered the same space, published better-structured content, and accumulated more links. My older posts simply could not keep up without an update.
The third reason is changing search intent. What people search for, and what they want when they land on a page, shifts. A keyword that used to convert well for a long-form guide might now favour a quick answer, a video, or a comparison table.
Step 1: Find Which Posts Are Worth Updating
Not every old post deserves a refresh. Some topics are permanently outdated. Others never had real traffic potential to begin with. The goal is to find posts that once had traction, or that rank on page two and three right now.
I use Google Search Console to find underperforming content. The process is simple. Filter your posts by impressions over the last three months, sorted by clicks.
Look for posts that get lots of impressions but low click-through rates. Those are your first priority because Google is already showing them. You just need to make them more clickable and more relevant.
Then look for posts that had strong traffic in the past but have declined sharply in the last six to twelve months. Export your data, compare periods, and you will find your targets quickly.
| Signal to Look For | What It Means | Priority |
|---|---|---|
| High impressions, low CTR | Ranking but not getting clicks. Title or meta needs work | High |
| Traffic dropped 40%+ in 12 months | Google freshness or competition issue | High |
| Ranking positions 8 to 20 | Close to page one. Small improvements can push you up | High |
| Still ranking but with lower engagement | Content quality may have been surpassed by competitors | Medium |
| Ranking for the wrong keywords | Search intent may have shifted from original purpose | Medium |
| Never ranked, published 3+ years ago | Topic may not have demand, or too much competition | Low |
There is also a practical question of word count and depth. If a competitor ranking above you has 2,000 words and yours has 800, that gap matters.
You can check your word count against top-ranking results, and a simple word counter tool can help you benchmark your content against what is already performing well.
Step 2: Analyse the Current Top Results
Once you have a list of posts to refresh, do not start rewriting yet. First, understand why the posts currently ranking above you are winning.
Open an incognito window and search your target keyword. Look at the top three results carefully. Ask yourself these questions.
What format are they using? Is it a numbered list, a how-to guide, a review, or a comparison table? If Google is showing mostly listicles and your post is a long prose essay, the format mismatch may be hurting you.
What topics do they cover that you do not? Read through the competing posts and note headings, subheadings, and sections you missed. These are gaps you need to fill.
How long are they? Are they significantly more detailed? Use a word counter to compare. Do they include things like videos, images, or interactive tools that your post lacks?
One thing I noticed when I refreshed a post about starting a YouTube channel is that the top results had added video tutorials embedded directly in the content.
Once I updated my own guide on how to create a YouTube channel for free to include step-by-step screenshots and embedded video, my time-on-page improved significantly, and rankings started recovering within six weeks.
Step 3: Update the Content Itself
This is where the actual work happens. Here is what I do for every post refresh, in a consistent order.
Update all statistics and data
If your post cites a 2020 study or a "recent report" from three years ago, those references make your content feel stale. Replace them with current data.
Link to original sources where you can, such as Google, HubSpot, Semrush, or peer-reviewed studies.
Rewrite the introduction
Most readers decide within the first few seconds whether to stay on a page.
If your opening paragraph is slow or generic, rewrite it to hook the reader immediately with a clear promise or a specific result they will get from reading.
Fill content gaps
Add the sections you identified from competitor research. If the top result covers a topic you skipped, cover it better. Use your own experience to add genuine insights that no one else can copy.
Break up long paragraphs
When I refresh older posts, I often find long blocks of text that I wrote quickly without thinking about mobile readers. Now I keep paragraphs to two or three sentences maximum. It makes the content far easier to scan on a phone.
Add or update visuals
Images, tables, infographics, and screenshots do more than look nice. They improve time-on-page and give Google more signals about what your content covers. I also add image alt text with relevant keywords every time.
Check and update internal links
Refreshed posts are a great opportunity to add internal links to your newer content.
When I updated a post about website monetisation, I added a natural mention of getting paid with Google AdSense and also linked to my guide on how to create a website and make money. Both links added context for readers and improved crawl depth for Google.
Step 4: Improve Your Title and Meta Description
The title tag and meta description are what users see in the search results before they ever visit your page. If your CTR is low, these are the first things to fix.
A strong title is specific, includes your target keyword naturally, and creates a reason to click. Compare these two versions.
"Updating Website Content for SEO"
"How to Update Old Blog Posts and Reclaim Lost Google Rankings (Step-by-Step)"
The updated version is more specific, shows a clear outcome, and includes the search phrase someone is likely to type.
Your meta description should expand on the title promise and include a subtle call to action. Keep it under 155 characters and make sure it answers "why should I click this result?"
According to Moz's title tag guide, small improvements to title formatting and specificity can lift CTR by 5 to 10 percent on their own, which compounds into meaningful traffic gains over time.
Step 5: Add Schema Markup
One area many bloggers overlook when refreshing old content is structured data. Schema markup helps Google understand what your content is about in a more structured way.
It can unlock rich results in search, like star ratings, FAQ dropdowns, or How-To steps directly in the search results.
I added FAQ schema to several of my guides and saw a noticeable increase in the amount of search real estate those posts occupied.
If you are not sure what this means, I wrote a plain-English breakdown of what schema markup is and why it matters for SEO.
For WordPress users, plugins like Rank Math or Yoast make adding schema straightforward without writing any code.
For those just getting started, reviewing the difference between platforms matters too. I have a comparison of Blogger vs. WordPress that covers this context.
Step 6: Fix Technical Issues Before You Re-publish
Content quality matters, but it can be undermined by technical problems that stop Google from properly reading and indexing your page.
Check your robots.txt
If you accidentally have your updated post blocked from crawling, no amount of great content will help. Make sure you understand how robots.txt works and that your important pages are not excluded from Google's crawlers.
Submit your sitemap
After making significant updates to a post, I always submit my sitemap to Google Search Console to prompt a faster re-crawl.
This is especially useful when you have updated several posts at once and want Google to pick up the changes quickly.
Check page speed
Page speed is a confirmed ranking factor for mobile searches. Run your updated post through Google PageSpeed Insights and fix any obvious issues. Compressing new images before uploading is one of the simplest ways to avoid a speed penalty.
- Check robots.txt: page is not blocked from crawling
- Confirm canonical tag points to the correct URL
- Update the published date and add a "last updated" note
- Compress and add alt text to all images
- Test page speed on mobile using PageSpeed Insights
- Submit sitemap to Google Search Console after publishing
- Request indexing via Search Console URL Inspection tool
- Add or update schema markup where relevant
Step 7: Build or Rebuild Links to the Updated Post
Updating the content itself is usually enough to start recovering rankings.
But if a post has lost links over time, because the sites linking to it went offline, or because competitors have earned more links in the meantime, you may need to rebuild some link authority as well.
You do not need to do anything complicated. A few high-quality links can make a significant difference. I covered this in depth in my guide on what backlinks are and why Google cares so much about them.
A practical approach after refreshing a post is to share it with sites or blogs that have previously linked to similar content.
Let them know you have substantially updated the article with new research, examples, and data. Some will update their link or add a mention of the newer version.
You can also earn new links by creating something genuinely useful within the post: a unique data table, an original infographic, or a step-by-step process no one else has documented. These "link magnets" give other writers a reason to reference your content.
How Long Before Rankings Recover?
This is the most common question I get, and the honest answer is: it depends. But based on my own experience, here is what a realistic timeline looks like.
There are exceptions. I have seen posts jump significantly in under two weeks after a major refresh, especially on topics where my previous version was very thin. But three to six months is a realistic window for meaningful recovery on competitive keywords.
The key is to track your results. Check Search Console weekly for your updated posts. Watch for increases in impressions, position changes, and click-through rate. This data tells you whether your update is working and what to do next.
What a Real Content Refresh Looks Like
To make this concrete, here is a real example from my own blog. I had published an article about website monetisation that had been performing well, then dropped from page one to position 14 over about eight months.
Here is what I changed during the refresh.
| Element | Before | After |
|---|---|---|
| Word count | 950 words | 2,400 words |
| Title tag | Generic, no number | Specific, includes outcome |
| Internal links | 2 links | 7 contextual links |
| External sources | 0 cited sources | 4 authoritative sources linked |
| Images | 1 stock image | 4 custom screenshots + 1 infographic |
| Schema markup | None | FAQ schema added |
| Ranking position (after 10 weeks) | Position 14 | Position 4 |
No new backlinks were built. The ranking recovery came entirely from the content and technical improvements. That is what a thorough refresh can do.
Common Mistakes to Avoid
Over time, I have made every mistake on this list at least once. Save yourself the time.
Changing the URL. If a post already has backlinks and indexed history, changing the URL resets all of that. Keep the original URL unless it contains something genuinely harmful to performance, like a year in the slug.
Updating the content but not the date. Always update the published date to reflect the refresh. Google uses this as one signal of freshness. Do not fake it. Only update the date when you have made substantial changes.
Making cosmetic changes and calling it a refresh. Fixing a typo or adding one paragraph is not a content refresh. You need to meaningfully improve the depth, accuracy, or usefulness of the post for Google to treat it as fresh.
Ignoring what is already ranking. Some bloggers refresh content based on what they think the post should cover, rather than what the searcher actually wants. Always check the current top results first.
Refreshing posts with no traffic potential. Some posts cover topics with very low or zero search demand. No refresh will fix that. Be selective with your time.
How Often Should You Refresh Old Content?
There is no single answer, but here is how I approach my publishing calendar.
For posts in fast-changing niches (technology, finance, digital marketing), I review performance every six months and refresh anything that has dropped more than 20 percent in clicks year-over-year.
For evergreen posts in slower niches, an annual review is usually enough.
Updating one existing post that already has authority will almost always produce better results than writing one new post from scratch, at least until your domain is well-established.
According to Semrush's content audit research, sites that regularly refresh existing content tend to outperform those that focus exclusively on publishing new articles, particularly in terms of organic traffic stability over time.
Once your blog matures, I would suggest splitting your content efforts: roughly 60 percent of your time on updating and refreshing, and 40 percent on creating new posts. That ratio has worked very well for me.
Tools That Make This Easier
You do not need expensive software to do this well. Here is what I use consistently.
| Tool | Purpose | Cost |
|---|---|---|
| Google Search Console | Find drops in clicks, impressions, and CTR | Free |
| PageSpeed Insights | Check mobile speed before re-publishing | Free |
| Rank Math or Yoast | Schema markup and on-page SEO checks in WordPress | Free / Paid |
| Ahrefs or Semrush | Keyword gap analysis and competitor content research | Paid |
| Word counter tool | Compare your content depth to top-ranking competitors | Free |
| Screaming Frog (free version) | Find broken internal links and missing meta descriptions | Free up to 500 URLs |
Final Thoughts
If there is one shift in mindset that has made the biggest difference to my blog growth, it is this: old posts are assets, not liabilities.
They already have some crawl history. They may have existing links. They have been indexed.
A well-executed refresh gives you all of that for free, and you spend your effort only on making the content better, not starting from zero.
The process I have described here is not complex. Find the posts with the most recovery potential, understand what the current top results are doing, update your content thoroughly, fix the technical side, and signal Google that you have made changes. Then wait, track, and repeat.
It requires patience. Rankings do not always move immediately. But the results, when they come, are more durable than chasing new keywords every week.
If you are ready to start, open Google Search Console right now and sort your posts by impressions. Pick the one with the biggest gap between impressions and clicks. That is your starting point.
Did You Get Your Rankings Back?
Tell me what you updated, which post recovered, and how long it took.
Your real-world experience is exactly what another blogger needs to see before they take the leap. Every comment gets a personal reply from me.